I actually started this a couple of months back, but now that I have something working to the point where I’m pretty excited about it, I’m ready to share my pet project. Back in college, one of my favorite classes was my small electronics class. Learning about half-adders and resistors was okay but the really fun part was using embedded programming to interface a micro-controller to the outside world. Ever since then, I’ve wanted to build some sort of embedded project of my own. I finally motivated myself to build something I’ve always wanted–an alarm clock that works the way I want it to.
Here are the features of my ideal alarm clock:
- Accurate to within a minute per month. Even better would be to synchronize to some time source.
- Shows date, time and day of the week (so after a rough night, I know for sure if it’s a workday or not =D )
- Easily visible during the day and at night.
- Time adjustment allows adding or subtracting hours and minutes. I hate missing the correct minute on my current alarm clock and having to hit the set button 59 more times.
- Alarm can be enabled/disabled according to the day of the week. Do I need an alarm on weekends? No. Am I so lazy that I don’t want to turn the alarm on and off every weekend? Yes.
Here are the items needed for breadboarding. This will be slightly different than the final bill of materials for the finished clock due to the breadboard power supply.
- An AVR ISP (In System Programmer) I built the USBtinyISP. SparkFun sells a slick version except that it doesn’t work well in Linux.
- Breadboard
- A reliable 5V power supply such as the 5V/3.3V breadboard power supply
- Atmel ATMega168
- 32.768kHz crystal oscillator
- 2x 22pF ceramic capacitor
- 2x 0.1uF ceramic capacitor
- Buzzer
- 3x Momentary push button switch
- 2x 10k Ohm resistor
- Photocell
- PNP transistor
- Break away male headers
- HD47780 compatible 16×2 character LCD display (see note!)
- Jumper wires (also available from Pololu)
Note on LCD display: I purchased my display off of Ebay for $5 and it works great. If you decide to use SparkFun’s display, keep in mind that it requires a resistor in series when you supply power to the backlight. The resistor is not included in my schematic because my display has the resistor built in.
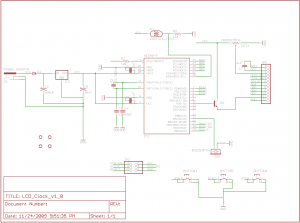
The notes on the image should give you an idea of what the components look like and what they are for. You will need to study the schematic to hook everything up correctly. If you are feeling lost at this point, read through the first two SparkFun tutorials then stop back. They will walk you through setting up the breadboard’s power supply and loading code onto an ATmega168.

If you’ve gotten this far, you’re probably interested in the code behind the alarm clock. It is available here. Keep in mind this is not a finished product yet so there are still some features missing. The RTC (real time clock) code is fairly solid though.
I already have a PCB layout ready in Eagle which I’m going to send out to get printed. I’m really looking forward to migrating from the breadboard to the finished product. I’ll make sure to post the result!
7 Comments
hi dear friend
thanks for your work
i would like to make this clock but i dont have atmega168
is that possible to use atmega16 or atmega32?
I don’t know for sure but my guess is that with some minor tweaks of the code, the clock would work with an atmega16 or 32. What I would do is compare Atmel’s spec sheets for those chips against the 168. Make sure they have the appropriate timers, ADC, etc (I think they do). Register names and compiler flags would need to be updated to work with the specific chip.
I like the perspective.
Have you made a video to show how you made it step by step? If not, can you make one?
I’m new to these electronic stuff so i’m not so good (i just started using the 555 chips)
@LANCE SANITA
I’ve provided the parts list, schematic, and code. What specifically do you need to know?
WE NEED A CONFIGURATION TO PERFORM THAT PROJECT PROPERLY TO OUR BREADBOARD.THANK YOU!GOD BLESS.
[…] next coding side-project is another WordPress plugin. After posting some photos of my breadboard, I decided it would be nice to have a way to add notes to those photos. The current solution is […]